(This is not a picture of the actual vehicle we worked on. This is a similar vehicle, a 2004 Silverado. The picture is from: http://www.edmunds.com/chevrolet/silverado-1500/2004/?sub=regular-cab.)
As we checked this one, we found the left side marker/turn signal bulb was not lighting. Many have questions about how to change certain bulbs on vehicles. Some are easier than others. Here is how you change this one.
First, we had to remove the headlamp assembly. To do this, we had to remove the holding pin. It simply slides out.
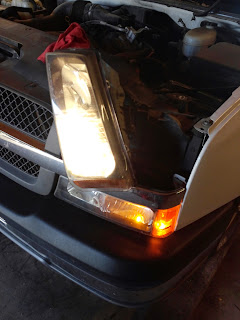
Once the pin is removed, the headlamp can be lifted up and moved out of the way. We did not disconnect the headlamp, we just simply moved it aside to gain access to the lower assembly.
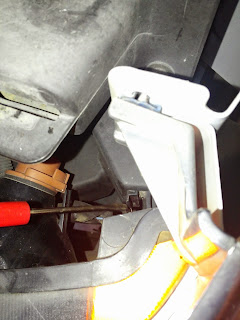
Now that the headlamp assembly is moved, we can get to the lower assembly. There is a plastic tab that moved be pressed to snap the assembly out of the bracket, allowing it to be moved to get to the bulb. In the picture below, I am pointing to this plastic tab with my screwdriver.
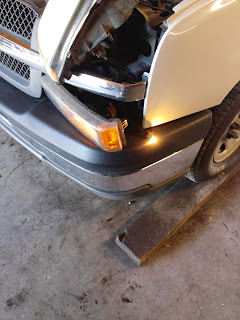
Once the tab is pressed, gently pull forward on the assembly. Be careful as this is done, so as not to break the plastic tabs. The picture below shows the assembly moved out from the bracket.
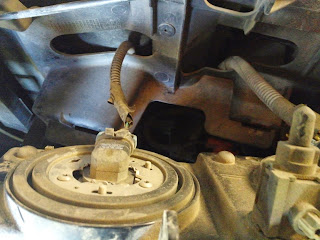
Below is another picture of me pointing to this plastic tab, this time with the assembly removed. This gives a better view of the tab.
At this point, it is a matter of replacing the burnt bulb. A simple twist of the connector will free it from the housing, then pull the old bulb out and replace it with a new one. The next picture shows the bulb now illuminated.
We then put the connector back into the housing and snapped the assembly back in place.
When reinstalling the headlamp assembly, you must get the plastic tabs/line up pins in the proper slots. The picture below shows the two tabs on the bottom of the headlamp assembly.
Those two tabs go into two slots. The picture below shows the two slots.
Once these are lined up properly, the headlamp assembly will go back in place and the holding pin can be slid back into place.
Once everything was back together, we did a quick recheck to make sure the bulb was illuminating properly.


